To install fonts on Windows XP, you can follow these steps:
1st step -Copy the File
Copy the font files you need to Install

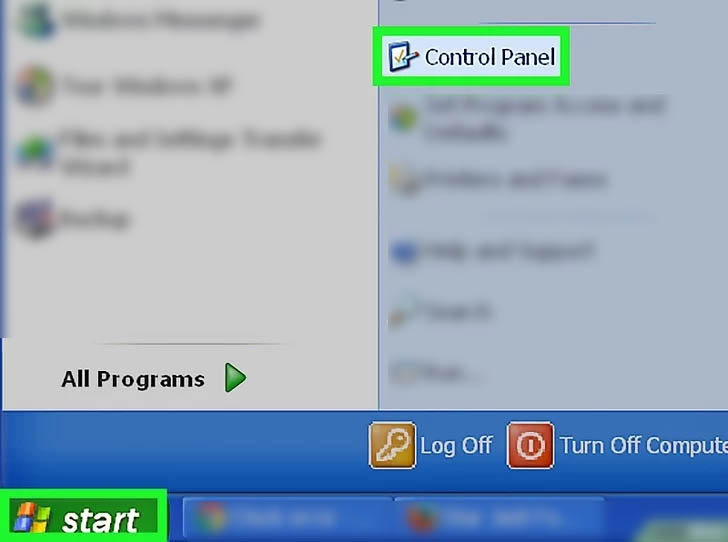
2nd step – Go to Control Panel
Click start menu and select Control Panel
3rd step – Go to Fonts
Open the fonts folder in the Control Panel

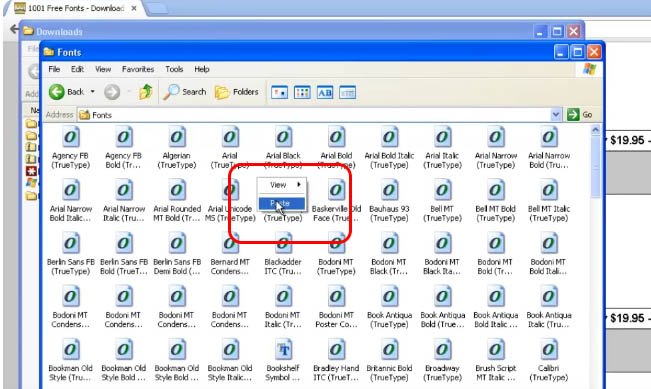
4th step – Paste Font
Right click and select Paste to copy the font file here
5th step – Restart the Programs
Sometimes, especially in older versions of Windows like XP, you may need to restart any programs you had open during the font installation process to see the newly installed fonts appear.
In some cases, especially if the fonts don’t appear after following the steps above, restarting your computer can help Windows recognize and apply the newly installed fonts.